Setting up Firebase
Before you can start sending messages to Android, you will have to at least set up a Firebase Cloud Messaging (FCM) project. This is all done via the Firebase Console. This guide walks you through generating the required Service Account JSON file and uploading it to your Actito app settings.
Create a Firebase project
Go to the Firebase console and create a new project. If you already have a Firebase project, you can skip this step.

Check the official Firebase documentation for more information on creating a Firebase project.
Enabling Firebase Cloud Messaging
In Firebase, click on the gear icon next to Project overview and select Project settings. Then, click on the Cloud Messaging tab.
If the Firebase Cloud Messaging API (v1) is not enabled, you will see the following message.
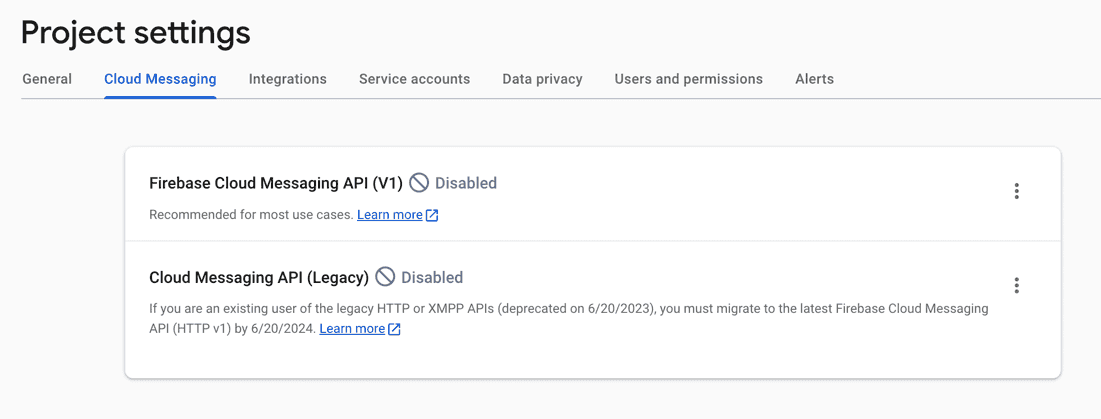
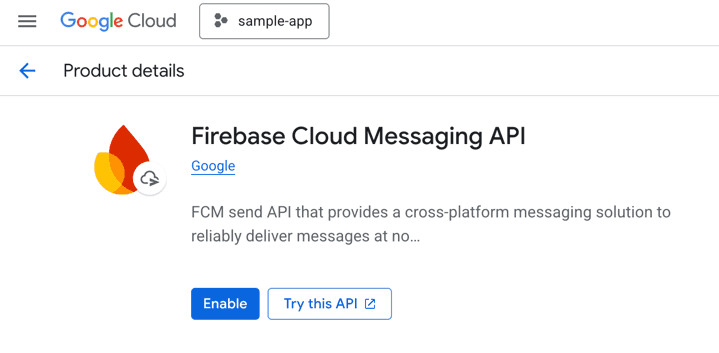
Click on the 3-dot menu and go to the Google Cloud Platform page to enable it.
Generate a Service Account
In Firebase, go to the Project overview > Project settings > Service accounts tab and generate a new Service Account for the Firebase Admin SDK.
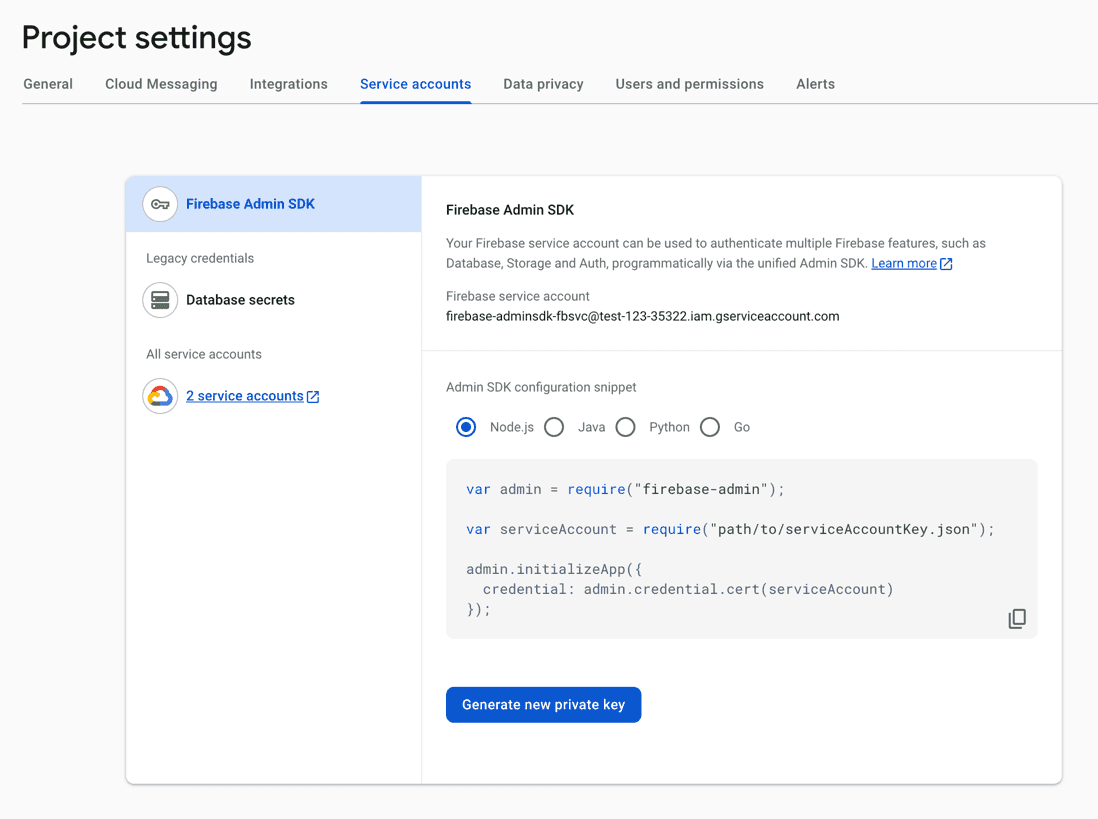
Save the Service Account JSON file somewhere safe. You will need it to configure your Actito application.
Upload the Service Account JSON file
This file needs to be uploaded in Actito. Please find the steps to do so here.
Register your app with Firebase
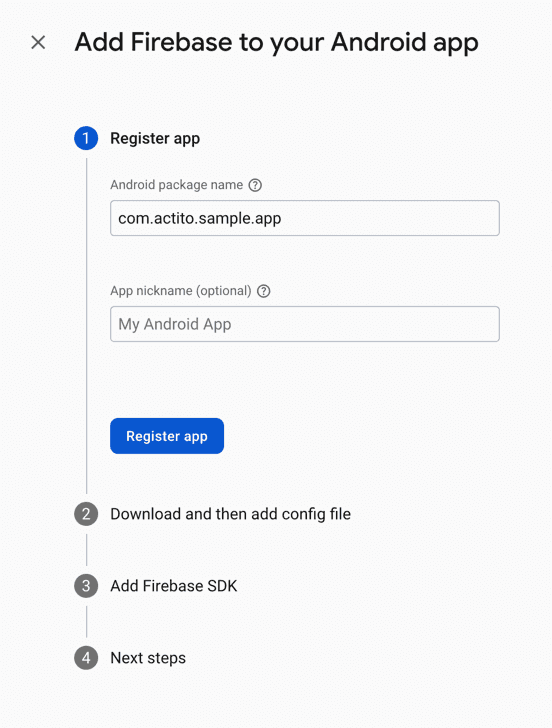
To use Firebase in your Android app, you need to register your app with your Firebase project. Registering your app is often called "adding" your app to your project.
- Go to the Firebase Console.
- In the center of the project overview page, click the Android icon or Add app to launch the setup workflow.
- Enter your app's package name in the Android package name field.
- Click Register app.
Add a Firebase configuration file
Download and then add your app's Firebase config file (google-services.json) to your codebase:
- Click Download google-services.json to obtain your app's Firebase config file.
- Move your config file into the module (app-level) directory of your app.
To make the values in your google-services.json configuration file accessible to Firebase SDKs, you need the Google services Gradle plugin (google-services).
- In your root-level (project-level) Gradle file (
<project>/build.gradle.ktsor<project>/build.gradle), add the Google services plugin as a dependency:
buildscript {
    dependencies {
        classpath("com.android.tools.build:gradle")
        // ...

        classpath 'com.google.gms:google-services:4.3.14'
    }
}
- In your module (app-level) Gradle file (usually
<project>/app/build.gradle.ktsor<project>/app/build.gradle), add the Google services plugin:
apply plugin: "com.android.application"
// ...

// Add the Google services Gradle plugin
apply plugin: 'com.google.gms.google-services'
Multiple Firebase projects
If your setup uses multiple Firebase projects, typically for development and production, you can use different Firebase configuration files for each environment. Place the Firebase configuration files in the following locations:
- Production configuration:
<project>/android/app/google-services.json - Development configuration:
<project>/android/app/src/debug/google-services.json
This approach uses Android's build configuration to determine which configuration file to use. You can read more about this approach in the Android documentation.