Zapier

What is Zapier?
Actito's purpose is to be able to connect with other platforms, in order to allow a global approach in your marketing automation. We are therefore compatible with various platforms and applications, such as Zapier.
Zapier is an online automation tool that connects numerous applications, such as Actito, Team Leader, Eventbrite, and over 1,000 more.
By building a Zap, you can connect Apps from different providers to synchronize data between them and automate repetitive tasks. All that without having to code anything.
Integrating Actito with Zapier
Zapier uses tools from Actito's Integration Framework (Webservices and Webhooks), to build user-defined data flows.
By connecting Actito to Zapier, you will be able to add a wide range of connections to your Marketing technology eco-system:
- Inform external systems when an event occurs in your Data Model in Actito (creation or update in a profile table, a subscription, a segmentation or a custom table).
- Trigger marketing actions in Actito based on changes occurring outside Actito (on profile tables, subscriptions, segmentations and custom tables).
Set-up
The integration with Zapier is entirely done via the Zapier online platform.
It is therefore necessary to have a Zapier account before starting the integration. Different price plans are available with Zapier according to the specificities of your business and the size of your team.
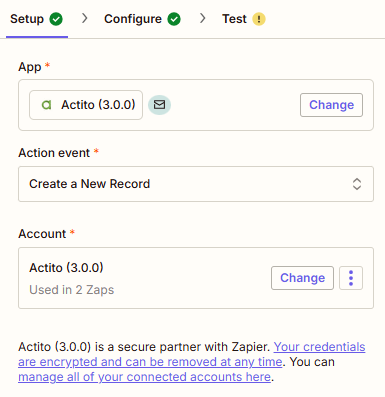
To use the Actito application in Zapier, you require access to an Actito API account.
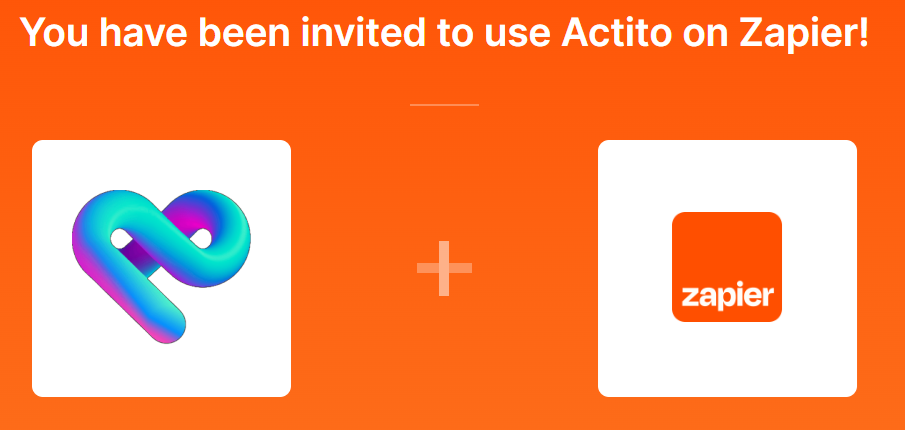
Invitation
Access to the Actito application on Zapier is currently by invitation only.
To be invited, you simply need to follow the public invitation link
It will give you the possibility to either create a Zapier account or to connect to your existing account. Once connected, you will be able to accept the invitation.
Building a Zap
From the Zapier homepage, click on "Create Zap".
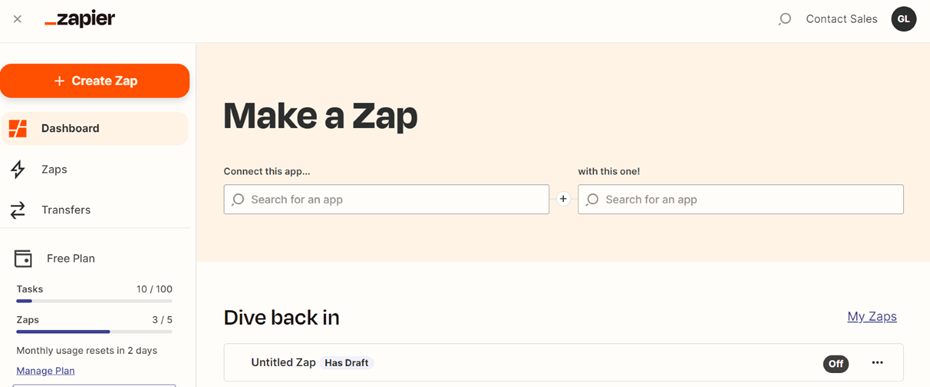
You can start by giving a name to your Zap in the top left corner.
What is a 'Zap'?
A Zap is an automated workflow that connects your apps and services together.
Each Zap consists of a Trigger Event and one Action (or more, according to your price plan).
Once activated, your Zap will run the Action every time the Trigger Event occurs.
The Actito application can be used both as Trigger Event and as Action.
1. Trigger
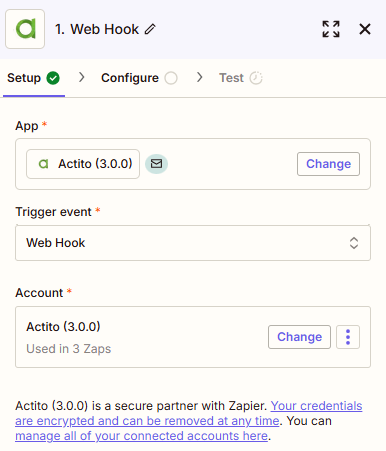
First of all, define the event used to start your Zap, the "Trigger".
Search for the application used as Trigger event, eg. Actito.

If the Actito application is used to trigger your Zap, the event will systematically be a Web Hook.
Click on "Continue".
A Webhook allows you to be notified for events occurring on a profile or a custom table. More information about this concept is available in the online documentation.
Connecting your account
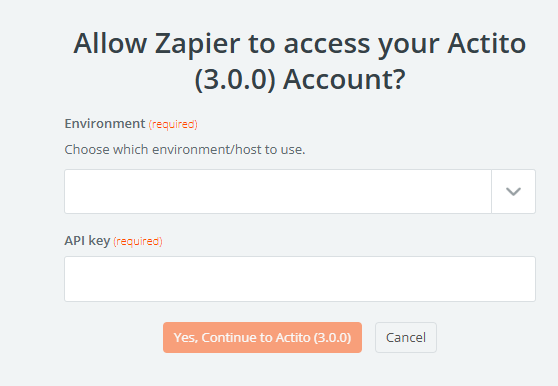
The connection is made through API Key.
See here to generate an API key. Then you only need to copy/paste the key in Zapier
This is also when you will be able to choose the environment to which you want to connect. The Actito integration with Zapier is available in both PROD and TEST environment.
Set the Webhook
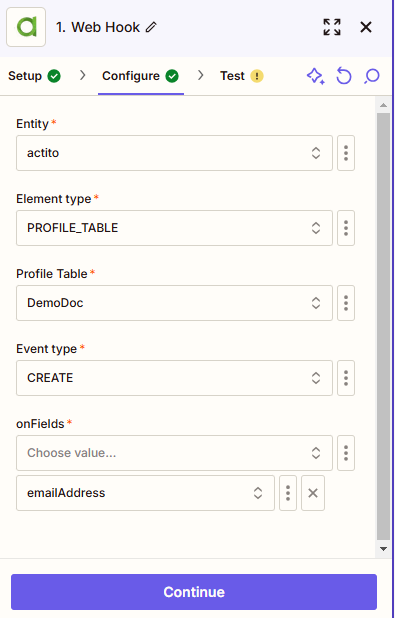
Next, you will be able to customize your Webhook, exactly as you can create a Webhook subscription via the Actito standard APIs.
Specify the entity and the type of table to which you want to listen:
- PROFILE_TABLE for profile tables
- CUSTOM_TABLE for custom table of the Data Model
Select the name of the table, then the type of element to which to listen.
The following events are available:
- CREATE : New profile or new table entry
- DELETE: Deletion of a profile or of a table entry
- UPDATE: Modification of a profile or of a table entry
- UPDATED_SEGMENT: Modification in relation to a segment (only for a profile table)
- UPDATED_SUBSCRIPTION: Modification in relation to a subscription (only for a profile table)
Finally, specify to which fields you want to listen in the "onFields" parameter. There are two uses to this parameter :
- On the one hand, these fields restrict the event trigger. Only events impacting at least one of the fields listed there will be taken into account.
- On the other hand, all fields listed there will appear in the content of the event submitted by the Webhook to the given URL.
In the following example, I want to trigger an Action whenever a profile is updated on the attributes "emailAddress" and "customerId".
The role of the Webhook is not only to identify the Trigger Event. In case of creation or update, it is also used to communicate the impacted information: the fields provided in the "onFields" parameter.
These fields will be communicated only if they are created of updated.
Therefore, in the previous example, if the e-mail address is updated but not the customerID, only the value for "e-mailAddress" will appear in the information communicated by the Webhook.
Testing the Webhook
The last step of the configuration of the Webhook is testing it.
Zapier will check whether it is possible to obtain information matching the Webhook definition from Actito.
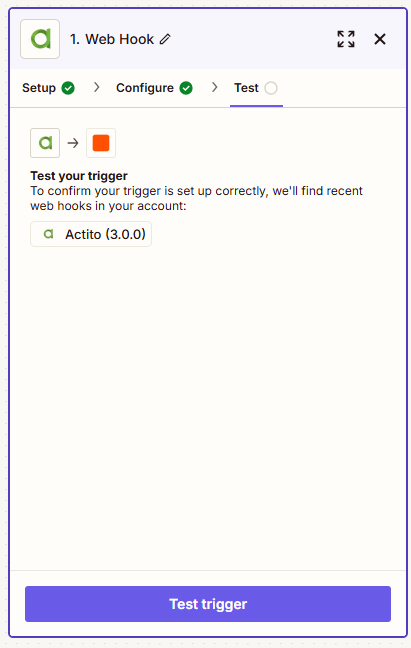
Click on "Test trigger" to test the connection and move to action definition (as long as the test is a success).
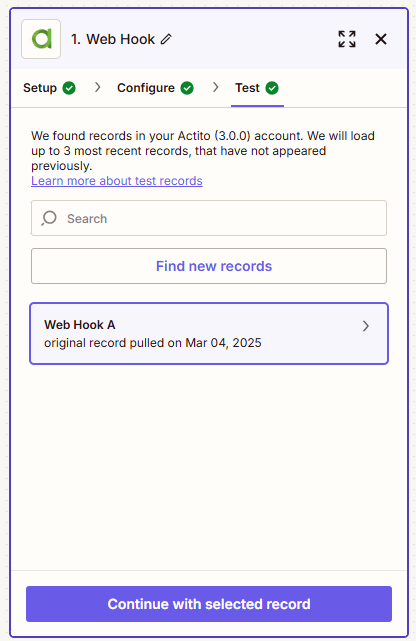
You will obtain a Web Hook record (whose values you cna check by clicking on it). Click on "Continue with selected record" to move to the Action part.
2. Action
The Action is the event carried out by your Zap once it has been triggered.
Search for the application which will be used to run the Action, eg. Actito.
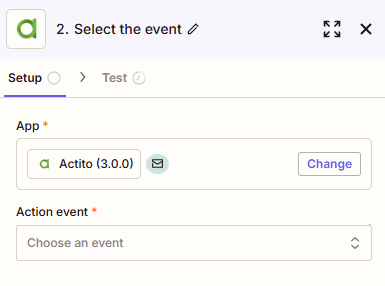
Next, select the type of action that you want to carry out. There are 6 possibilities via the Actito application in Zapier.
- CREATE, UPDATE or DELETE a Profile
- CREATE, UPDATE or DELETE a Record (from a custom table)
Next, you have to select the Actito Webservice account from which you want to run the Action.
DELETE methods must be used with caution. While in Actito confirmation will always be required before a deletion, there is no warning in Zapier. It is therefore crucial to carefully check the Trigger Event and the aim of the Zap before automating a deletion.
Set the Action
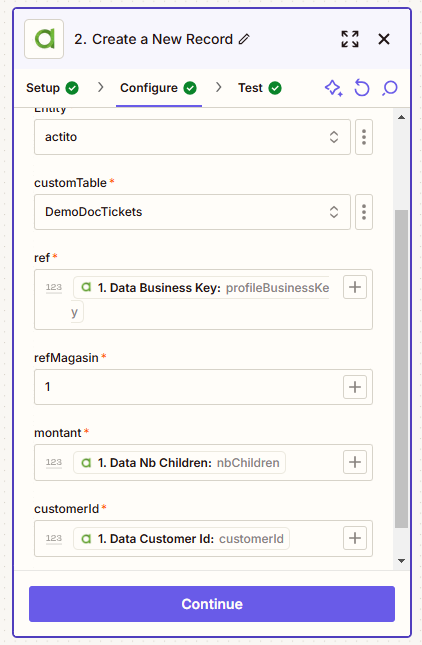
First, specify the entity and the (profile or custom) table on which you want to carry out the Action.
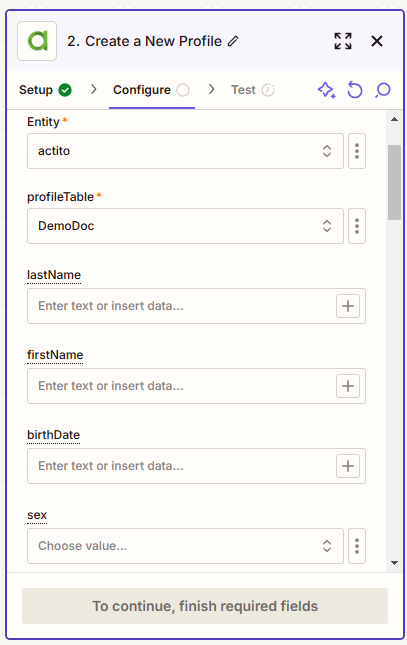
Next, you can specify the value that the fields of the table shall take (for CREATE and UPDATE methods).
- Either by providing a fixed value, which will be identical with every execution
Fixed value must be used with caution. It is possible to update the subscriptions and segmentations of a profile via this method, without validation. Improperly using this feature might have harmful consequences on your database.
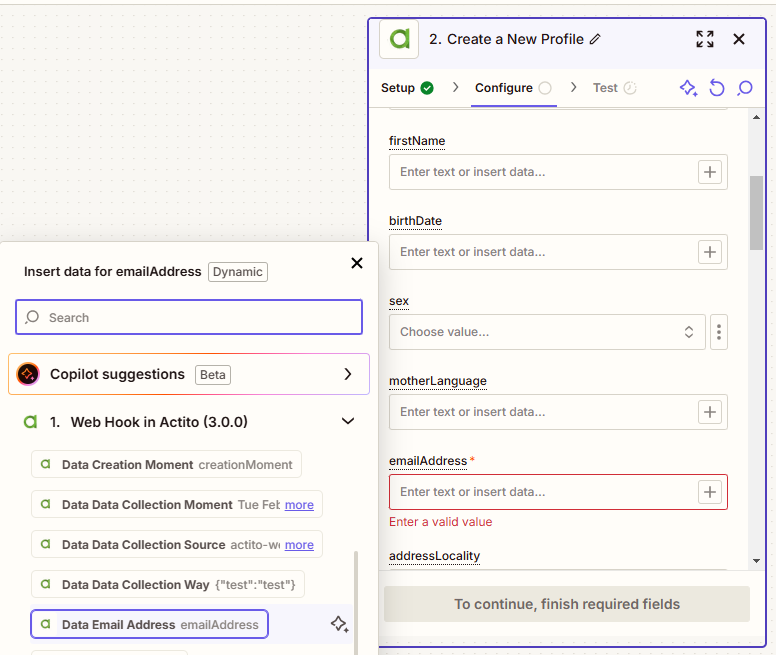
- Either by matching it with an information communicated by the Trigger Event. Here, I want the emailAddress attribute value of my new profile to match the data communicated for Email Address by the Webhook used as Trigger Event.
Testing the Action
Once your Webhook is customize, you can click on "Continue" and move to the Test step.
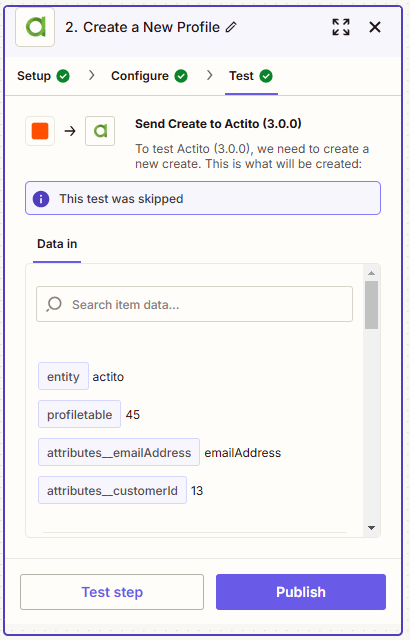
Click on "Test & Review" or "Test & Continue" to finalize your Action.
Unlike the Test step for the Trigger Event, it is not mandatory here. It can be skipped via the "Skip Test".
According to the information used in your Action, you might have to skip the Test step. Indeed, Zapier recognizes some value types (string, integer, boolean, date,…). However, Actito uses additional type validators, such as e-mail address, country, mobile phone number…
As such, when attempting to test the creation of a profile with an emailAddress attribute, Zapier will try push a simple string, which does not match the format expected by Actito (eg. name@domain.com). You will therefore get a 400 error (InvalidValue). This is normal and can be skipped.
Activating the Zap
Once you have set up a Trigger Event and an Action, you can activate your Zap.
This can be done by clicking on "Publish" after completing the action, or through the button in the top right corner.
All your Zaps (active or not) will appear in the “My Zaps” tab of the Zapier homepage.
From this tab, they can be activated, deactivated, edited or deleted at any time.
View the Task History
A Task is an individual action carried out by Zapier. It is an execution of your Zap.
You can review these task executions via the "Task History" tab of the Zapier homepage.
From this tab, you can see whether a task has run successfully or if it fell into error. Click on a line in error to get its details.
Final Note
As a connector, the goal of Zapier is to link Actito to another application.
Therefore, the Actito app will usually not be used both as Trigger Event and as Action in the same Zap.
As a matter of fact, if we look a bit closer to it, the Zap used as example here (if a profile is updated, a similar profile is created in another profile table) does not really make sense�… unless one considers the transition of a profile from a Prospect table to a Clients table !
But even in such a use case, we would need to make sure that this prospect has become active, for example via a status update. How to include this condition in my Zap ? There is an advanced feature called Filters which allows to do so !
Advanced features require a Zapier PRO account. For an overview of what is possible, refer to the following "Going further" section.
Going further
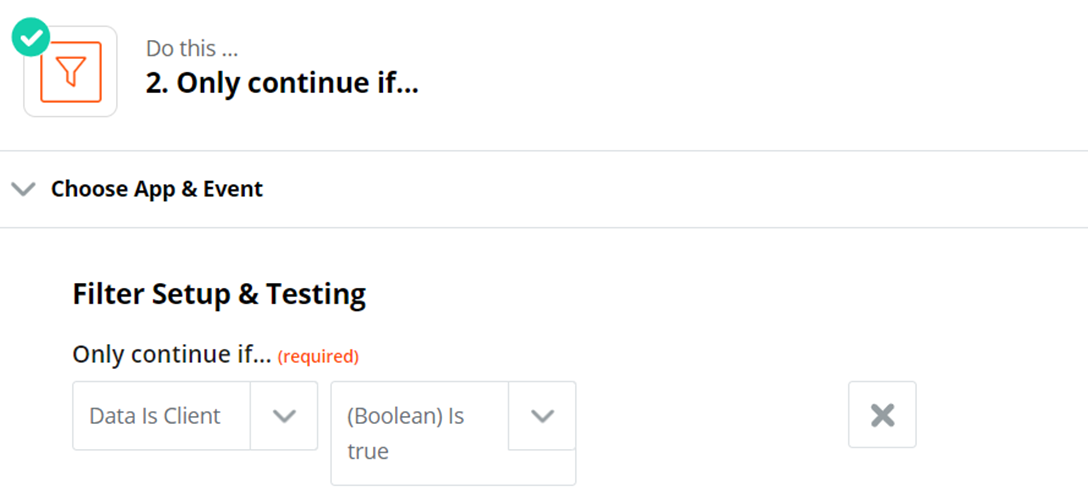
Filter
A Filter can be inserted in a Zap between the Trigger Event and the Action so that the Zap is only executed if specific conditions are met.
In our use case, the Zap must be executed only if the "isClient" status of my prospect is updated to TRUE. µ
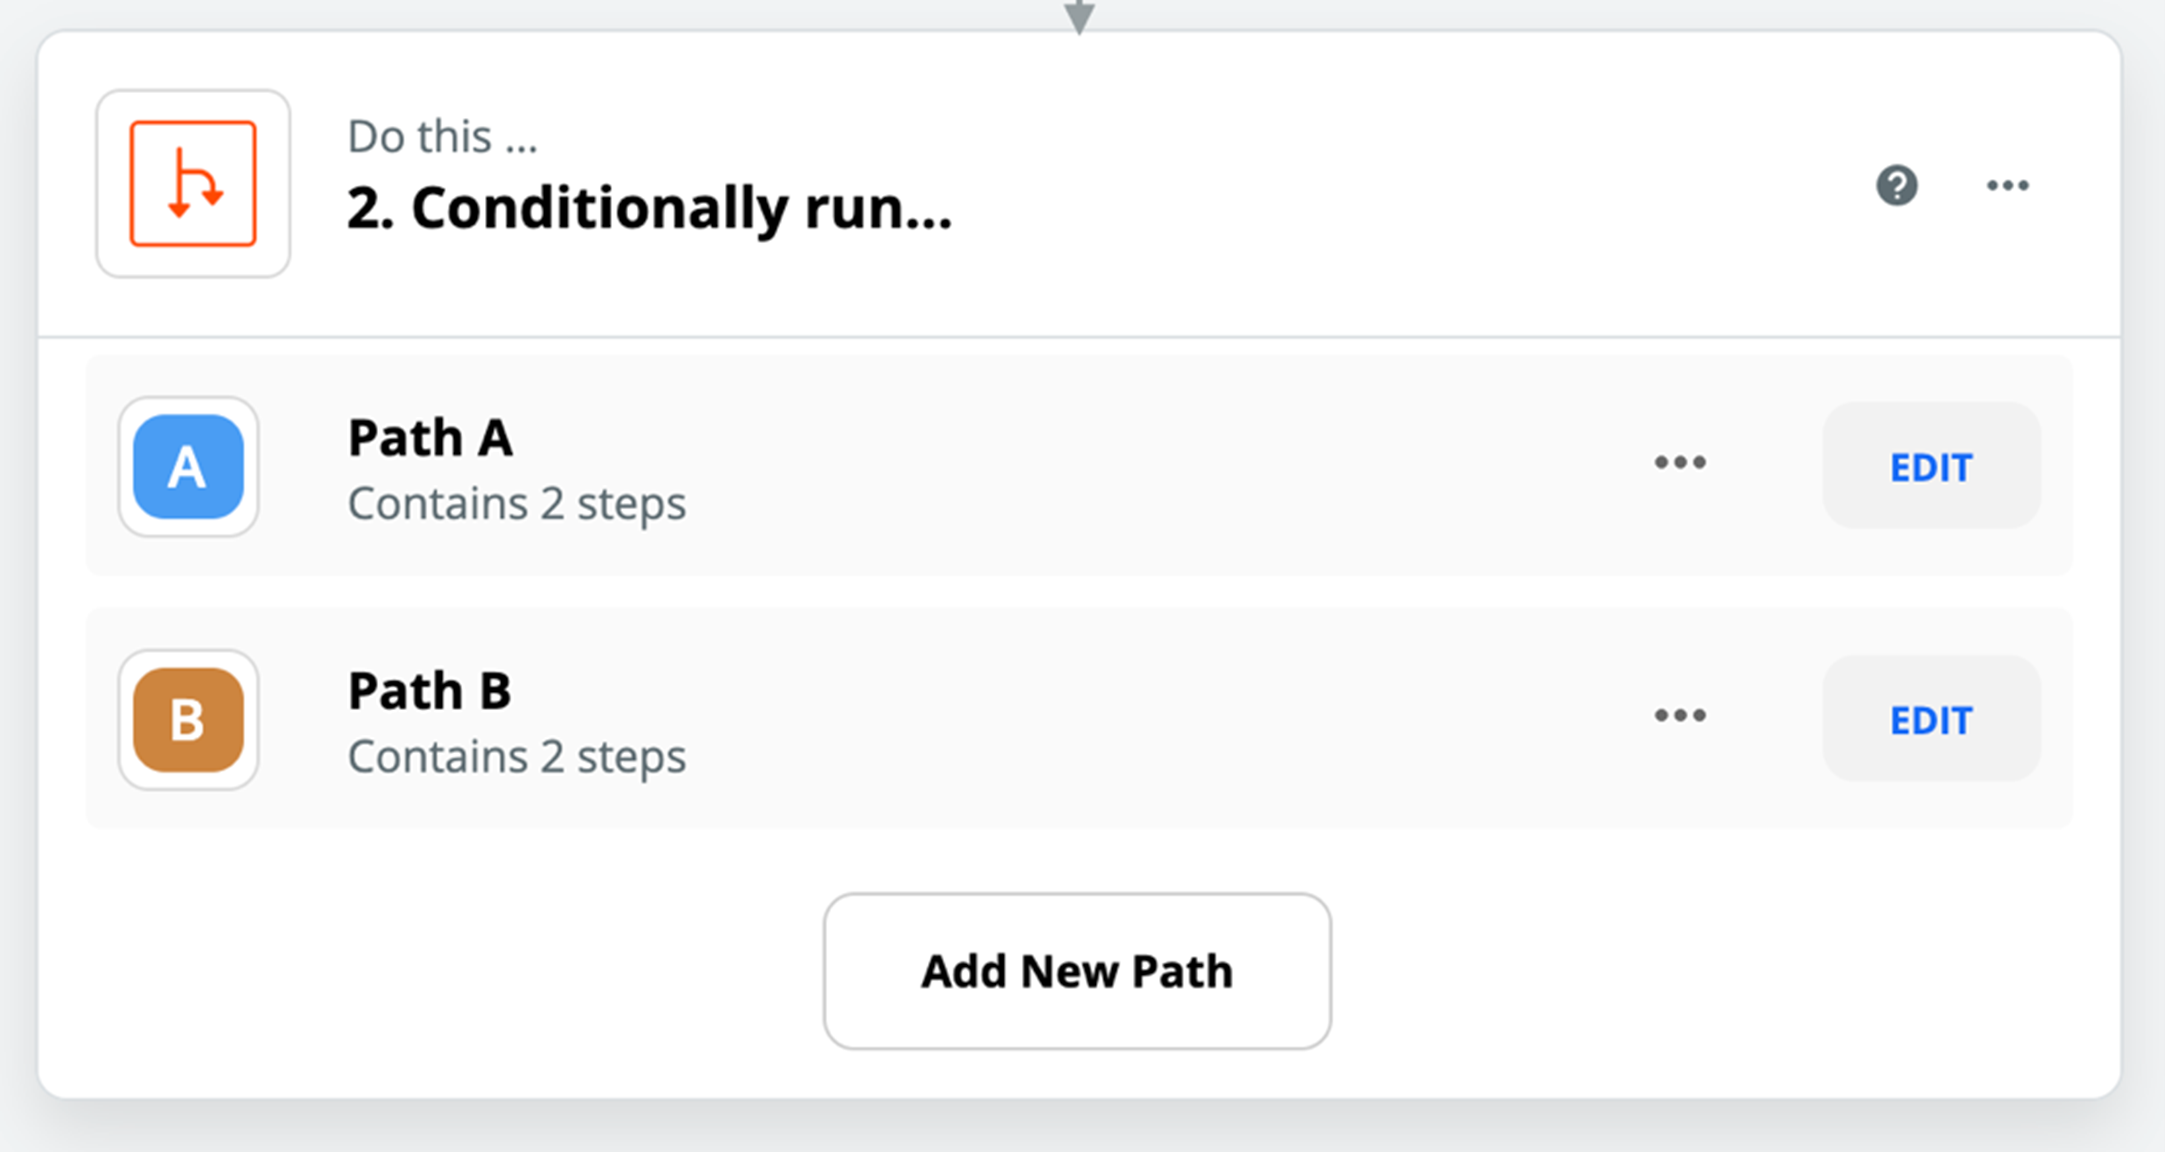
Path
A Path uses the same logic as a filter, except that it allows to divide the Zap into two paths according to the condition… just as in an Actito scenario.
Delay
A Delay allows to pause the Zap between the Trigger Event and the Action.

Multi-steps Zap
Why limit yourself to a single Action? While a Zap is always limited to a single Trigger Event, several Actions can be carried out one after the other.
And even more...
To discover every feature available by using Actito with the Zapier connector, the best way remains to directly step into the Zapier documentation.
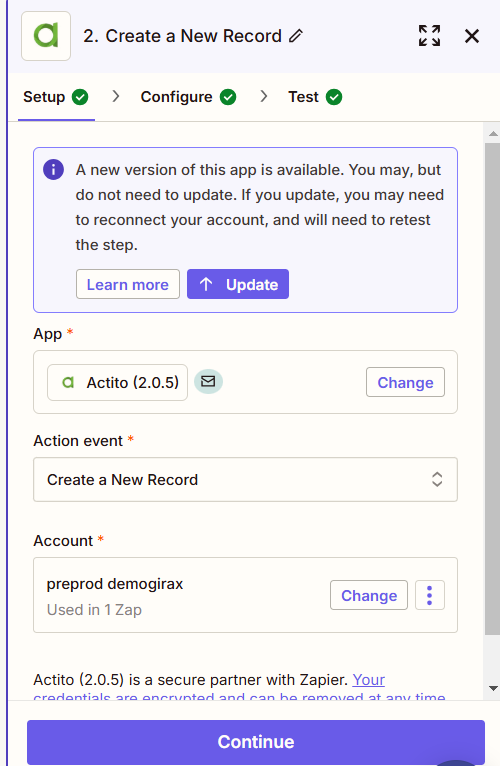
Migrating to the Actito 3.0 app
Actito updates the version of its Zapier connector when features are added to it or to reflect the changes undergone by the API calls used by the connector.
The 3.0.0 version was introduced so that the Actito app in Zapier uses the latest version of the Actito public API.
The 2.0.5 version uses deprecated API calls that will be sunsetted. It is therefore necessary to switch to the 3.0.0 version.
To upgrade your Actito app in Zapier to the latest version, please follow the guide below.
1. Gain access to the latest version
To be eligible to the 3.0.0 version of the Actito app, you need to click again on the invitation link.
2. Update your app version in each block of your zaps
The update needs to be applied individually in each of your zaps that uses the Actito app.
Please 'Edit' your zaps and select the Actito 'Trigger' or 'Action' blocks.
A message generated by Zapier will inform you that a new version of the app is available. Click on the Update button to update your app.
Click on 'Confirm update' to validate the update.
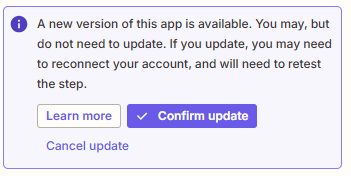
After updating, you may need to reconnect your account:
- the first time you use the 3.0.0 app, you'll need to re-enter your API key as explained here
- afterward, you'll only need to select the reconnected 3.0.0 account from the dropdown list
3. Migrate your settings
Once you have reconnected your account, you may need to re-configure some settings depending of your use of the Actito connector.
- All Webhook triggers require 1 simple step and Zapier does not let you move forward without performing it.
- All Profile actions require 1 simple step but Zapier lets you move forward without performing it. However, your intervention is mandatory. Please follow this section carefully if your zap is used to create, update or delete a profile.
- All (custom table) Record actions do not require any intevention.
Web hooks trigger blocks
After updating, you'll need to re-enter the Element type: PROFILE or CUSTOM table.
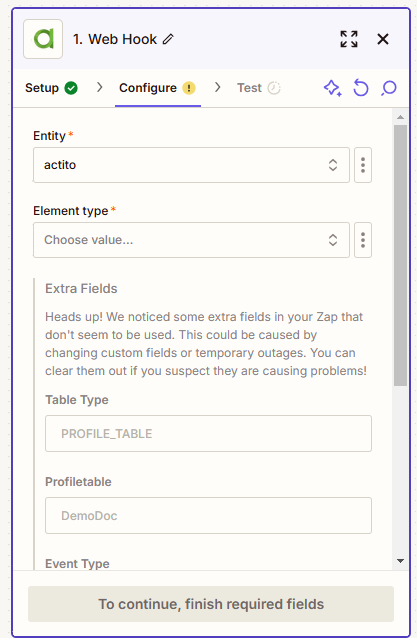
The previously mapped information remains visible in the greyed out "Extra fields" below.
After selecting the Element type, all the previously selected setting remain correctly mapped! You can simply click on "Continue" to re-validate your block.
If you want to listen to additional elements by updating the onFields parameter, you will need to re-select your Profile table or Custom table in the dropdown list to refresh the available fields of your table.
Profile action blocks
To migrate the CREATE, UPDATE and DELETE a PROFILE to version 3.0.0, it is mandatory to perform 1 simple step described below.
Please follow this section carefully if you use this type of actions.
After updating, all your previously mapped fields will appear as 'Extra fields'.
Zapier will allow you to 'Continue' without intervention, but your zap won't work anymore if you directly click 'Continue'.
To migrate successfully, please open the profileTable dropdown and re-select your profile table.
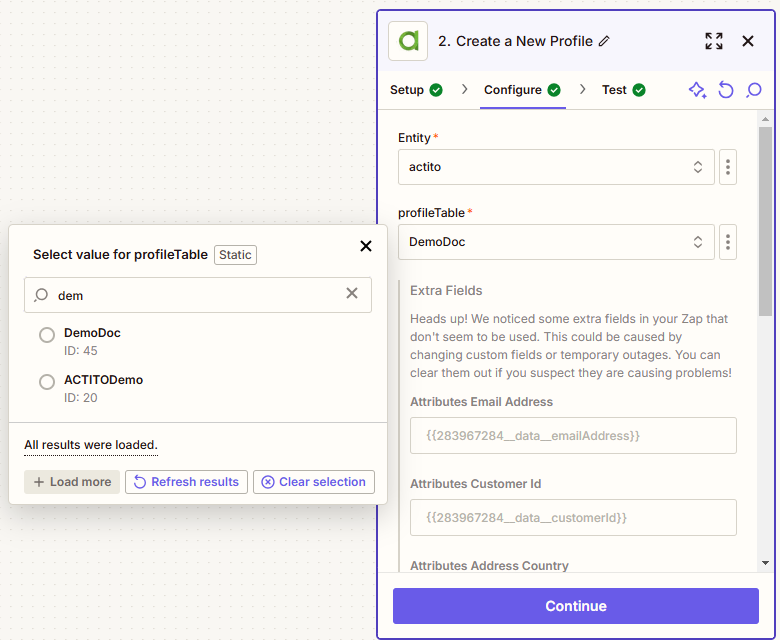
After simply re-selecting your profile table, the full mapping will be available and most of your parameters will have been migrated automatically.
- All "attributes" and "subscriptions" keep the same format and are migrated automatically, requiring no further action.
- "Segmentations" may require to be re-mapped because their format has changed.
All elements that need to be re-mapped will be displayed in the the greyed out "Extra fields".
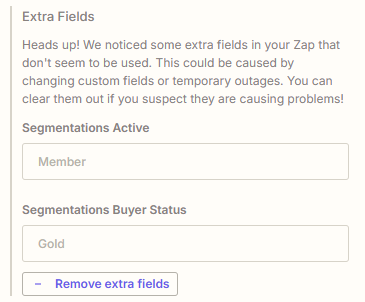
After mapping these elements again, you can 'Remove extra fields' to clean-up unused data.
Custom table records action block
After migrating the CREATE, UPDATE or DELETE a RECORD (from a custom table), all your previously mapped fields will be automatically migrated and you have nothing do, except clicking on 'Continue' to re-validate your zap.